Foragers Jam Recipe
Our Development Worker Gemma takes us through her Forager’s Jam recipe in her latest blog.
I love making jam, but only learned how to make it a few years ago through my job at Greener Kirkcaldy.
I had always put off making jam as I thought it required lots of expensive equipment and kitchen skills.
This recipe isn’t for the “perfect” jam it is definitely “jam on a budget”, it uses zero fancy equipment and the fruit content is foraged berries I collected over a few days. I want to show you that you can still get a great tasting jam just by using what you have to hand at home.
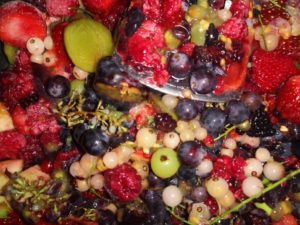
I collected mainly brambles and raspberries, from different locations, and made a seedless mixed berry jam. Seedless jam requires you to squeeze the juice and pulp out of the berries leaving the skins and seeds to be discarded.
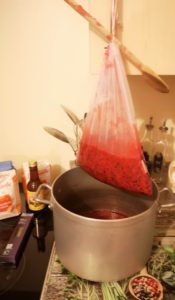
Straight away I had to improvise, as I didn’t have a jam bag, so I used a reusable net bag instead. It was from a supermarket vegetable aisle – but, it worked!
You could also use a sieve, if you have one, you won’t get 100% seedless jam but it will filter out many of the seeds.
Equipment Used
- Heavy Bottom Pan
- Wooden Spoon
- 3 or 4 Big Bowls for weighing and measuring
- Kitchen Scales
- Potato Masher/Stick Blender
- Ladle/Jug
- Jam Jars with Lids
Sterilise jars by washing in hot soapy water, rinsing and drying in a warm oven at 140ﹾC.
Ingredients
- Berries
- Granulated Sugar
Instructions
Once you have collected plenty of berries place them in a big bowl and mash them, I used a stick blender, but you could use a potato masher or fork.
Strain the liquid through your sieve (or net bag) into a big bowl/container, scrape the pulp in too.
Weigh the strained liquid, mine was 450g.
The fruit to sugar ratio for jam is generally 1:1, this meant that I had to weigh out 450g of sugar to add to the liquid.
Add the liquid and the sugar into your heavy bottomed pan and stir over a medium heat until the sugar has dissolved.
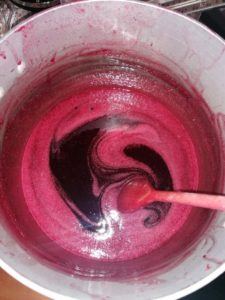
Continue cooking until it comes to the boil, stir every so often to avoid the jam scorching, boil for 5 minutes.
Jam needs to reach 220ﹾC in order to set, to measure this accurately you need a sugar thermometer. But, if you don’t have one of them you can do a plate test instead, I start checking my jam after 5 minutes of boiling.
How to do a plate test;
- Put a plate in your freezer for 15 minutes.
- Drop a teaspoon of jam onto the plate and let it sit for 30 seconds.
- Tilt the plate and if the jam is still runny then it is not ready.
- Check every 5 minutes until ready, continue to stir in between checks.
- Jam will be ready when it sits like a gel on the plate test.
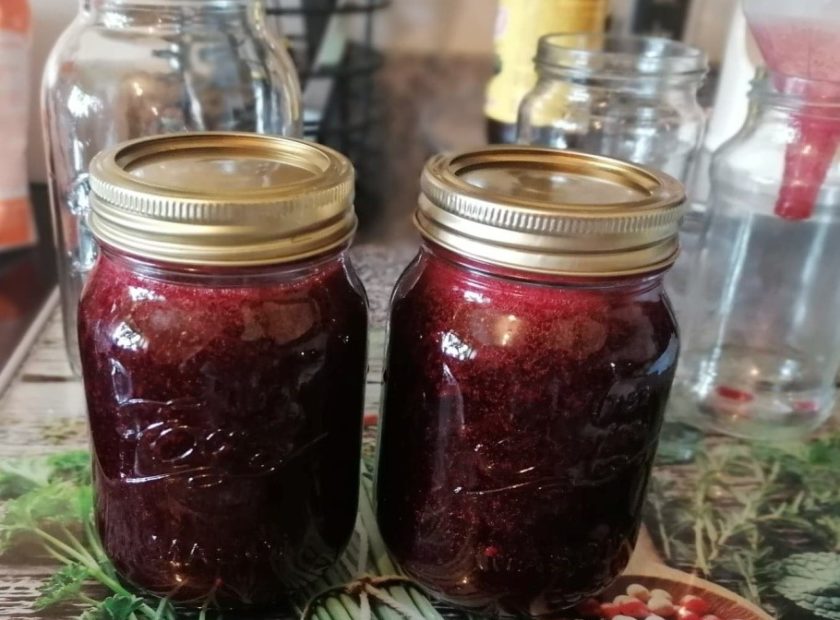
When your jam is ready to decant into jars, label and use or give away!
